
3 Mac Processing IDE ダークテーマに変更
日頃の文章やプログラム作成は、背景色が黒いダークテーマを使用しています。このため、Processing IDE だけが白く目立ち違和感がありました。そこで Processing IDE の背景も下のように黒に変更します。
ダークテーマへの変更
- Processing 4 を起動し、任意のスケッチを開きます。
- メニュー >> ツール >> Theme Selector を選びます。
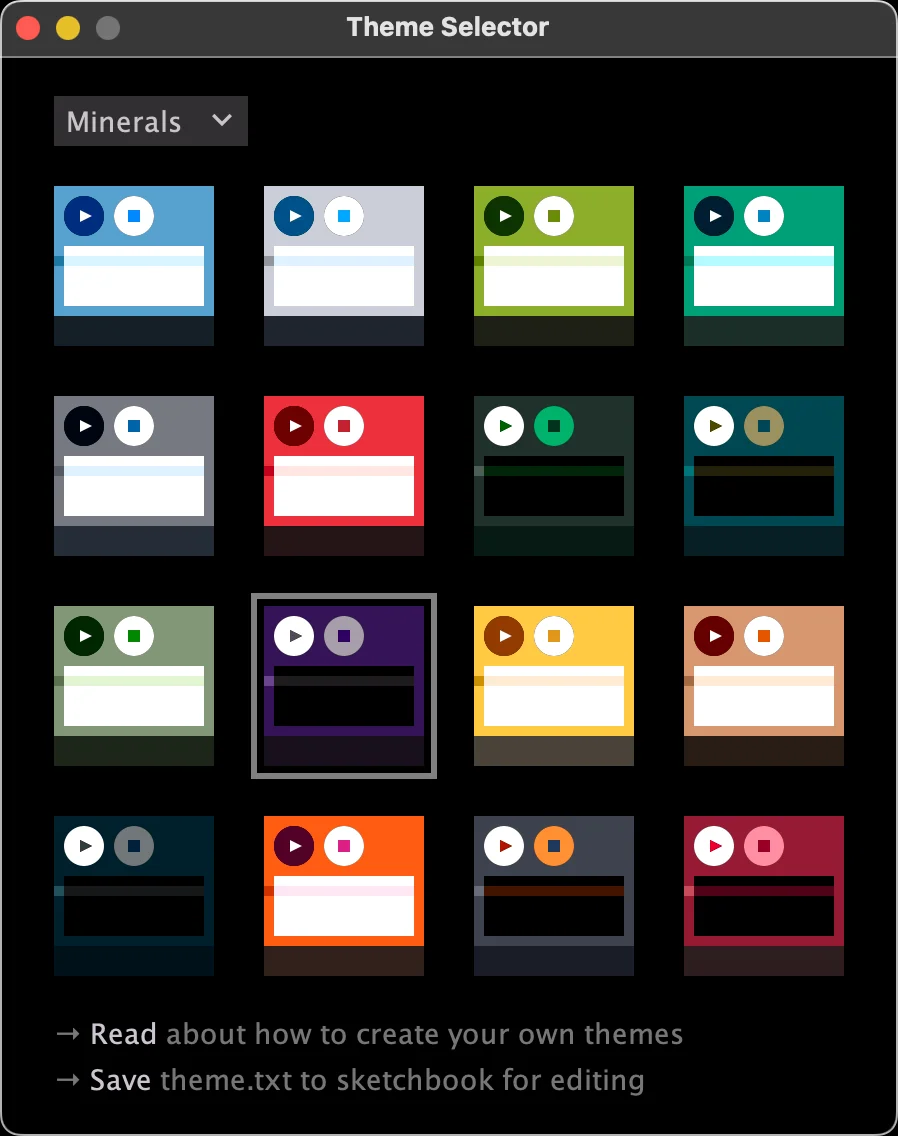
- 下のようなSelector画面が表示されるので、好みのテーマを選びます。
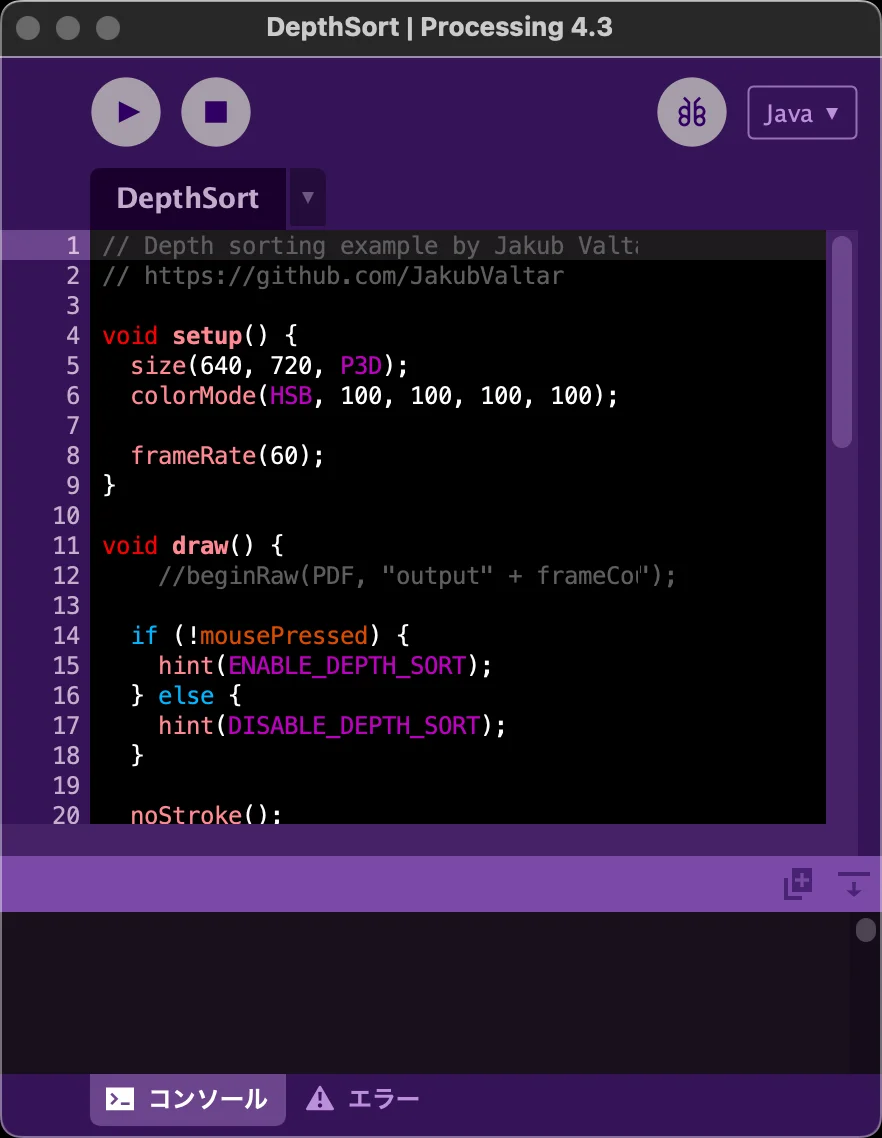
上のスケッチ画像は、Minerals系の上から3段目左から二個目のテーマを指定した例です。
Theme Selector には単色テーマ (Minerals)とグラデーション テーマ (Alloys) があり、それぞれ16種類が利用可能です。
独自のテーマを作成
Processing 4 では、独自のテーマを作成することもできます。
独自テーマの作成手順は
- ツール >> Theme Selector に移動し、Selector画面で元となるテーマをクリックして選びます。
- Selector画面最下部の [Save theme.txt to your sketchbook for editing] の『Save』部をクリックします。
- スケッチブックフォルダーにtheme.txtファイルが保存されます。
(Macの場合、書類 / Processing / theme.txt)
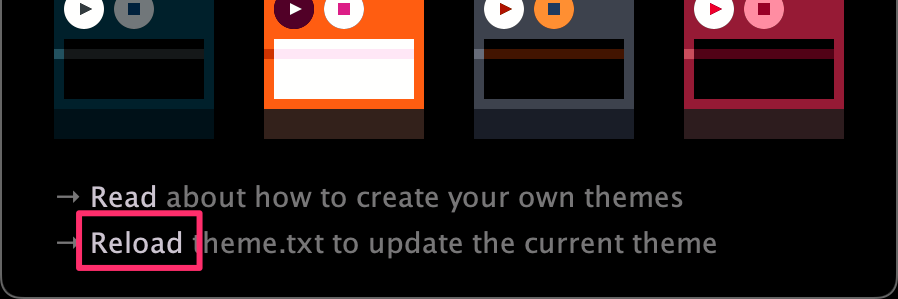
スケッチブックフォルダーにtheme.txtファイルが保存されると、Theme Selector の下部にある[Save ...]が[Reload ...]に変化します。 - theme.txtをテキストエディットなどのエディターアプリで変更したい項目の内容を書き換えファイルを上書き保存します。
(変更例は後述) - Theme Selector の下部にある[Reload ...]の『Reload』部をクリックします。
- IDEは、theme.txt を再読み込みして変更した内容をテーマに反映します。
- 変更が意図したように反映されたか確認しましょう。

変更例1 --- コメント文字の明るさを明るく
変更例1として、コメント文字の明るさを明るく変更します。色を指定しているのは、スケッチブックフォルダーに保存されているtheme.txtファイルです。テキストエディットなどで、theme.txt を開き 36行目からの色コードを変更してください。
色コードは、RBG順の8bit x 3を 16進で表したものです。
変更例1 変更前
editor.token.comment1.style=#5E5E5E,plain
editor.token.comment2.style=#5E5E5E,plain
変更例1 変更後
editor.token.comment1.style=#888888,plain
editor.token.comment2.style=#888888,plain
[Reload ...]の『Reload』部をクリックし変更内容を確認
色コードを変更した theme.txt を上書き保存した後に『Reload』部をクリックしてください。
IDEは、theme.txt を再読み込みして変更した内容をテーマに反映します。
見やすくなりました。
変更例2 --- マウスで選択した文字背景を明るく
変更例2として、マウスで選択した文字の背景を少し明るく変更します。
テキストエディットなどで、theme.txt を開き 35行目の色コードを変更してください。
色コードは、RBG順の8bit x 3を 16進で表したものです。
変更例2 変更前
editor.selection.color=#312E34
変更例2 変更後
editor.selection.color=#456588
[Reload ...]の『Reload』部をクリックし変更内容を確認
色コードを変更した theme.txt を上書き保存した後に『Reload』部をクリックしてください。
IDEは、theme.txt を再読み込みして変更した内容をテーマに反映します。
どの行を変更したら良いのか
コメントの色を指定する目的の行は
editor.token.comment・・・・・・
なのですぐに探せるけれど、例えば、void の場合どの行を変更したら良いのか?
簡単な方法は、現行の表示色を頼りに、例えば、「赤が濃いから」色コード初めの二文字は大きめの数値の行かな? などと推測し、以下の手順を繰り返します。
- 推測したの行の色コードを試しに変更
- theme.txt を上書き保存
- Reload をクリック
- IDEの変化を確かめる
原始的ですが、意外とスムースに目的を達成できます。しかし、2−3度試してもうまくいかない場合には、Processingアプリ内の定義ファイルを確認し目的の予約語がどの予約語分類に属しているのかを調べれば、どの行を変更したら良いのかがわかります。
定義ファイルのアドレスは、
. /Contents/Java/modes/java/keywords.txt
なお、アプリ内のファイルを見るには、FinderでProcessing.app を右クリックし、「パッケージの内容を表示」を選択します。void の該当部は以下のようです。
このファイルは重要なシステム定義ファイルですから内容を変更しないよう注意して取り扱いましょう。
214| true	KEYWORD1	true
215| void	KEYWORD1	void
216| volatile	KEYWORD1
void が、KEYWORD1 に分類されているので、theme.txt の
editor.token.keyword1.style=#DD0019,plain
が予約語 void の色コードを指定する行になります。