Curiosityの基本動作から応用プログラムまでを学びます。

このページは、Microchip Developer Help を翻訳したものです。
この記事は、MCCの mTouch® module を使い、8-bit Curiosityボード上の mTouchボタンをどのような手順で有効にするのか解説します。解説の中で、mTouch library APIのボタン関連関数の使い方も説明しています。
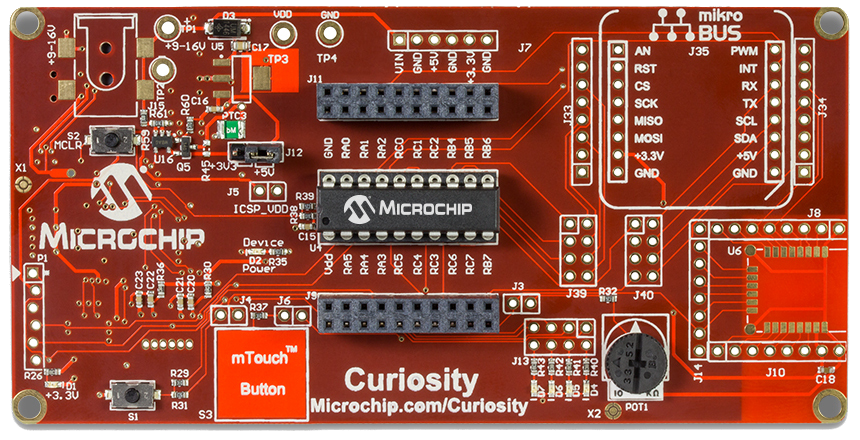
Curiosity ボードは多くの 8 bit PICをサポートしていますが、ここでは、PIC16F1619 を使用します。
もし、MPLAB® X IDE の使用法に慣れていない方は、他の MPLAB X Page を参照してください。
もし、上記のような MCC ロゴが表示されていない場合には、MCC プラグインがインストールされていいるか確認してください。MCC のインストールは、ここ に説明があります。
8MHz_HF Internal Clock を選択し、PLL を有効にします。この結果 32MHz system clock になります。
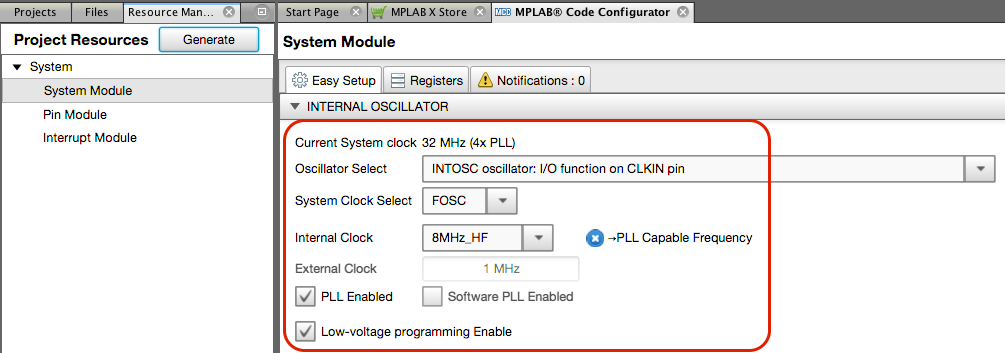
mTouch の動作を確実に行うには、8 MHz system clock が必要です。8MHz より遅いシステムクロックを選ぶと notification window に警告が表示されます。
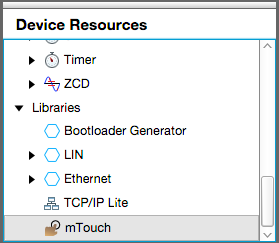
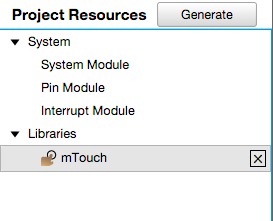
Device Resources ウインド内の Libraries list にある mTouch icon をダブルクリックします。
モジュールがロードされると mTouch icon が、Project Resources に現れます。
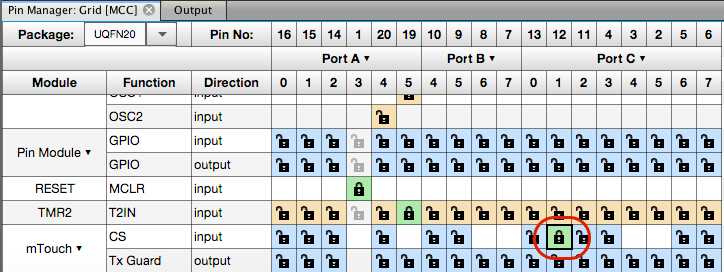
mTouch module がロードされると、Pin Manager に、利用できる mTouch sensor pin が表示されます。
pin RC1 を mTouch sensor に指定します。このピンは Curiosity ボードの mTouch Button に接続されています。
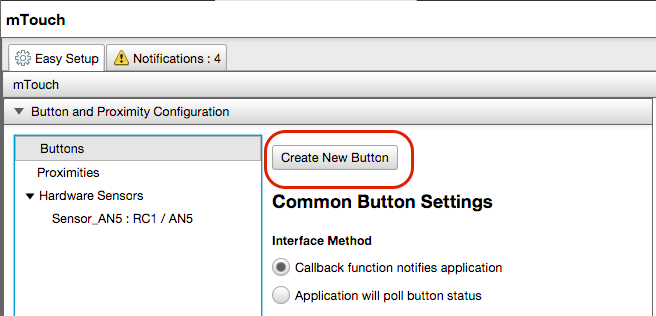
Buttons タブを選び、Create New Button をクリックします。
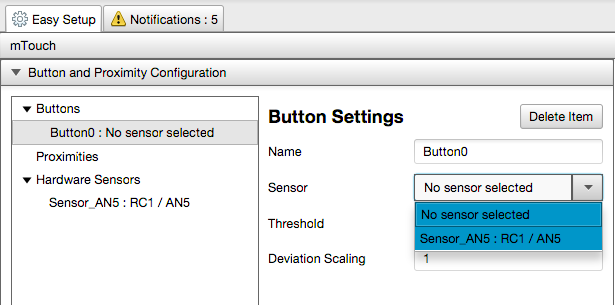
次に、Button0 icon をクリックして Button Settings 画面で、 Sensor_AN5 を選びます。
PIC16F1619 の mTouch では、software CVD を使用するため、Automatic Frequency Adaptation (AFA) を起動し CVD 定期スキャンを有効にするため、Timer からの割り込み処理が必要です。
mTouch library v2.00 以降は、AFA を有効にすると自動で割り込みも有効に設定されるため、このステップは行う必要はありません。
これより古い version では、Interrupt Module を開き、関連タイマーの割り込みを手動で有効にします。この例では TMR2 が AFA タイマーに設定されています。
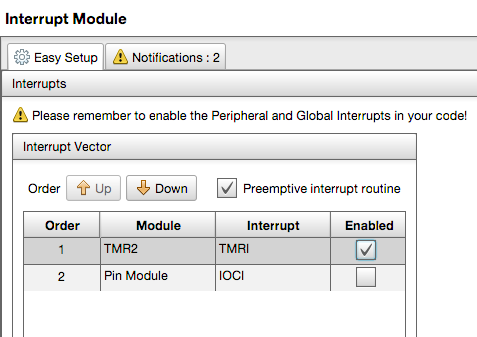
もし、関連タイマーの割り込みが有効にされていない場合には、Notification ウインドーに警告が表示されます。

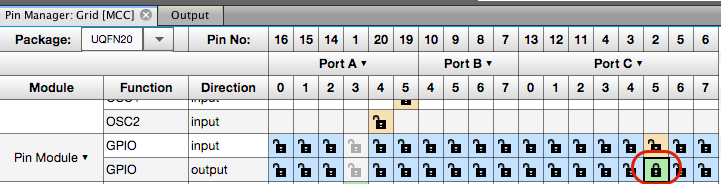
LED D7 を mTouch ボタンの表示に指定します。
Pin Manager で、LED D7 が接続されている RC5 pin を出力にします。
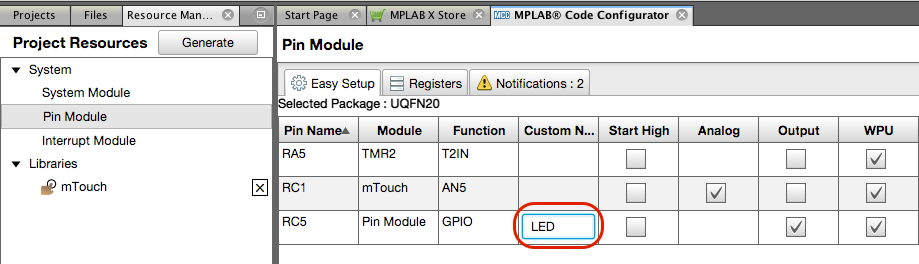
Pin Module でピンの名称を LED に書き換えます。
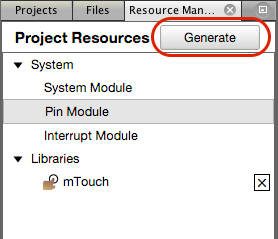
Generate button をクリックします。
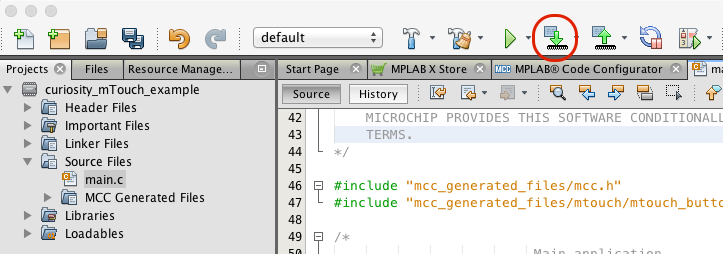
自動生成された main.c ファイルを開き、global および peripheral 割り込みを有効にするために2つのマクロのコメントを外します。
INTERRUPT_GlobalInterruptEnable()
INTERRUPT_PeripheralInterruptEnable()
さらに
MTOUCH_Service_Mainloop()
を while ループ内に配置します。下記リストでは赤でハイライトされています。
void main(void)
{
    // initialize the device
    SYSTEM_Initialize();

    // When using interrupts, you need to set the Global and Peripheral Interrupt Enable bits
    // Use the following macros to:

    // Enable the Global Interrupts
    INTERRUPT_GlobalInterruptEnable();

    // Enable the Peripheral Interrupts
    INTERRUPT_PeripheralInterruptEnable();

    // Disable the Global Interrupts
    //INTERRUPT_GlobalInterruptDisable();

    // Disable the Peripheral Interrupts
    //INTERRUPT_PeripheralInterruptDisable();

    while (1)
    {
        // Add your application code
        MTOUCH_Service_Mainloop();
    }
}
API では:
bool MTOUCH_Button_isPressed(enum mtouch_button_names button)
が、ボタンのON/OFFを示します。
この例では、ボタンが一つしかないので "Button0" または "0" を引数に使用します。ボタンを押した時に LED D7 (active high) を点灯し、ボタンから指が離れた時に LED を消灯します。必要なアプリコードを描きリストに示します。追記・変更する命令は赤でハイライトされた行です。
#include "mcc_generated_files/mcc.h"

/*
                         Main application
 */
void main(void)
{
    // initialize the device
    SYSTEM_Initialize();

    // When using interrupts, you need to set the Global and Peripheral Interrupt Enable bits
    // Use the following macros to:

    // Enable the Global Interrupts
    INTERRUPT_GlobalInterruptEnable();

    // Enable the Peripheral Interrupts
    INTERRUPT_PeripheralInterruptEnable();

    // Disable the Global Interrupts
    //INTERRUPT_GlobalInterruptDisable();

    // Disable the Peripheral Interrupts
    //INTERRUPT_PeripheralInterruptDisable();

    while (1)
    {
        // Add your application code
        if(MTOUCH_Service_Mainloop())
        {
            if(MTOUCH_Button_isPressed(Button0))
                LED_SetHigh();
            else
                LED_SetLow();
         }
    }
}
Program アイコンをクリックし、PICにプログラムを書き込みます。
書き込み終了後に、mTouch ボタンを押すと LED D7 が点灯します。

プロジェクトファイルとコンパイル後のHEXファイルを掲載します。
プロジェクト A02_mTouchV2.zip |
HEXファイル Curiosity_mTouch.zip |